
Confirm the shipment status shows Closed, then pull the Discrepancy column before you touch anything else. Export the Inventory Ledger, Inventory Adjustments, and the Shipment Contents tab for the SKU in question, and start collecting proof of delivery and proof of ownership now, not after you file, following best practices from our step-by-step guide to selling on Amazon. A case built on both evidence lanes at once moves faster and gets rejected far less often than one filed on a hunch.
TL;DR:
- Ensure the shipment is marked as closed and past the eligibility date before creating or submitting any reconciliation case to avoid automatic rejection.
- Use the Inventory Ledger and Inventory Adjustments reports together to verify unit movements, reason codes, and balances, focusing on unresolved negative adjustments.
- Gather both proof of ownership and proof of delivery, cross-referenced in a clear table, and convert editable spreadsheets to PDFs or JPGs to prevent rejection of evidence.
- Build a detailed shipment chronology, focus only on unmatched negative adjustments, and file with all relevant identifiers and organized evidence to improve approval chances.
- Regularly photograph and log shipments at check-in, standardize packing and labeling, and run monthly reconciliations to reduce discrepancies and streamline future claims.
Table of Contents
- FBA Inventory Reconciliation: A Quick Triage Checklist
- Which Seller Central Reports Actually Answer Your Question
- How to Build a Case That Actually Gets Approved
- What Counts as Real Evidence (and What Gets Rejected)
- Filing the Case: Timelines, Fields, and Follow-Up
- Checking Reimbursements Against Your Own Books
- Cutting Future Discrepancies Down to a Trickle
- Why Former Sellers Handle Reconciliation Differently
- How some fulfillment providers reduce reconciliation headaches before they start
- Where to Verify These Reconciliation Steps Yourself
- Sources
- FAQ
FBA Inventory Reconciliation: A Quick Triage Checklist
Before you file anything, run through this sequence. It takes about twenty minutes and saves you from burning a claim attempt on a shipment that was never actually short.
- Filter the Shipping Queue to Closed shipments and write down the exact Discrepancy figure next to each affected SKU.
- Download three reports for the SKU and date range: Manage FBA Inventory, Inventory Ledger, and Inventory Adjustments.
- Gather carrier documentation, including proof of delivery, bill of lading, and full tracking history, plus your packing slips and supplier invoices.
- Check the Reconcile tool for your eligibility date. Filing before that date is one of the fastest ways to get an automatic rejection.
That last step trips up more sellers than any other part of FBA inventory reconciliation. Amazon will not investigate a shipment that hasn’t finished processing, no matter how convincing your paperwork looks.
Which Seller Central Reports Actually Answer Your Question
Each report answers a different question, and pulling the wrong one wastes an afternoon.
- Inventory Ledger reconstructs unit movement across a date range and gives you closing balances, which is what you need for accounting-side reconciliation rather than a one-off discrepancy check.
- Inventory Adjustments shows reason codes for every adjustment Amazon made. Filter by damaged, lost, and found to isolate what’s already been resolved versus what’s still open.
- Manage FBA Inventory gives you the live snapshot: on-hand, reserved, inbound, and anything marked stranded.
- Shipping Queue → Reconcile / Contents lets you compare what you shipped against what Amazon confirms it received, SKU by SKU.
- Reimbursements report tells you whether Amazon already issued an automatic credit and for how much.
The Inventory Adjustments report and Inventory Ledger together cover most of what you need to reconcile FBA inventory for a given period, since one shows the reason and the other shows the running balance, according to Inventory Hero’s breakdown of FBA report types.
How to Build a Case That Actually Gets Approved
Most rejected cases fail for the same reason: the seller filed too early or handed Amazon a pile of documents with no clear story connecting them. Here’s the sequence that works.
- Build a chronology. Start from shipment creation, log every carrier event, note the receiving date, and mark when units were finally located (or confirmed missing). This single document is what separates a credible case from a guess.
- Strip out net-zero adjustments. If a unit was marked lost and then found later in the same cycle, it nets to zero and isn’t worth pursuing. Focus only on unmatched negative adjustments, since those are the ones representing real loss.
- Match the issue to a claim type. Lost inventory, damaged by Amazon, inbound shipment discrepancy, unrestocked returns, and fee overcharges each require slightly different documentation.
- Assemble both evidence lanes before you file. You need proof of ownership and proof of delivery ready at the same time, not one added after Amazon asks for it.
- Confirm eligibility before filing. The shipment must be Closed, and the Reconcile tool must show you past the eligibility date.
Pro Tip: Keep every screenshot, case ID, and carrier confirmation in one dated folder from day one. When Amazon asks a follow-up question three weeks into an investigation, you want to answer in five minutes, not by rebuilding your timeline from memory.
Sellers who present a full chronology alongside both evidence lanes see meaningfully fewer rejections than those who file with partial documentation, according to Seller Central’s own reconciliation guidance.
What Counts as Real Evidence (and What Gets Rejected)
Amazon evaluates two separate evidence lanes, and weak documentation in either one sinks the whole case.
- Ownership evidence: supplier invoices, purchase orders, and signed packing slips. Stamped PDFs or clearly photographed originals carry more weight than a plain digital copy.
- Delivery evidence: carrier proof of delivery, bill of lading, tracking or pro numbers, appointment confirmations, and pallet or box counts at drop-off.
- Cross-reference everything in one table: Invoice number → Shipment ID → ASIN/FNSKU → Quantity. This is exactly the format an inbound discrepancy checklist recommends, and it makes a reviewer’s job frictionless.
- Skip editable spreadsheets as primary proof. A live Excel file looks like something you could alter after the fact. Convert to PDF or JPG before you attach it.
Pro Tip: If your supplier invoice and your shipment plan list slightly different quantities, resolve that gap in your own notes before you submit anything. A reviewer who spots an unexplained mismatch will assume the worst and reject on the spot.
Filing the Case: Timelines, Fields, and Follow-Up
Once your evidence is organized, file through Seller Central’s case log and include every identifier the reviewer needs to locate the shipment without asking you twice.
- Include ASIN, FNSKU, shipment ID, and any relevant adjustment IDs in the initial case description, not buried in an attachment.
- Expect an initial reply within a few days. Full investigations typically resolve in 2 to 30 days, though complex cases can stretch to around 60 days.
- The most common rejection cause is filing too early. Wait until the shipment is Closed and the eligibility date has passed, and always submit both evidence lanes together, not sequentially.
- Log every case ID and response date in your reconciliation folder so you can produce a clean audit trail if Amazon reopens the question later.
Checking Reimbursements Against Your Own Books
An approved case or an automatic credit isn’t the finish line. You still need to verify the number.
- Pull the Reimbursements report and confirm both the quantity and dollar amount Amazon credited.
- Compare that figure to your actual landed cost per SKU, not the retail price. Amazon sometimes defaults to an estimated cost when you haven’t entered your own sourcing cost, which can underpay the claim.
- If the credit looks short, reopen the case with an itemized cost breakdown showing your calculated value.
- Record reimbursements as a separate line item in accounting, apart from regular sales revenue, so year-end audits and monthly reconciliations don’t require untangling the two later.
Third-party recovery specialists estimate that diligent claim tracking recovers roughly 1 to 3 percent of annual revenue for many sellers, spread across lost inventory, damage, shipment discrepancies, and fee overcharges. That’s real money sitting in reports most sellers only check when something already feels wrong.
Cutting Future Discrepancies Down to a Trickle
Reconciliation work shrinks dramatically once you build a few habits into your regular routine instead of treating every discrepancy as a fire drill.
- Watch your Inventory Performance Index and sell-through rate. Amazon’s own FBA Inventory tool is built to flag excess and stranded stock before it turns into a reconciliation headache.
- Standardize prep and labeling across every SKU, and enforce a carrier checklist with box counts confirmed at pickup, not after the truck leaves. Our guide on FBA inventory check-in best practices covers the specifics.
- Photograph every pallet and carton before it leaves your dock. This single habit resolves more disputes in your favor than any amount of after-the-fact paperwork.
- Sync your ERP or WMS exports with the Inventory Ledger for clean period-end closes. Some integrations refresh adjustment data as often as every 30 minutes, which matters if you’re reconciling in near real time.
- Schedule a monthly ledger-versus-live-inventory check, plus a quick QC pass on any new inbound shipment, rather than waiting for a shortage to force the review.
Pro Tip: Run your monthly reconciliation the same week every time, ideally right after your ledger closes. Consistency here catches small discrepancies while they’re still cheap to fix, before they compound into a claim.
Why Former Sellers Handle Reconciliation Differently
Most reconciliation advice gets written by people who’ve never had to eat a $4,000 discrepancy out of their own margin. That gap shows up in the advice: generic guides tell you to “keep good records,” but they don’t tell you which records Amazon actually credits and which ones get waved off as insufficient.
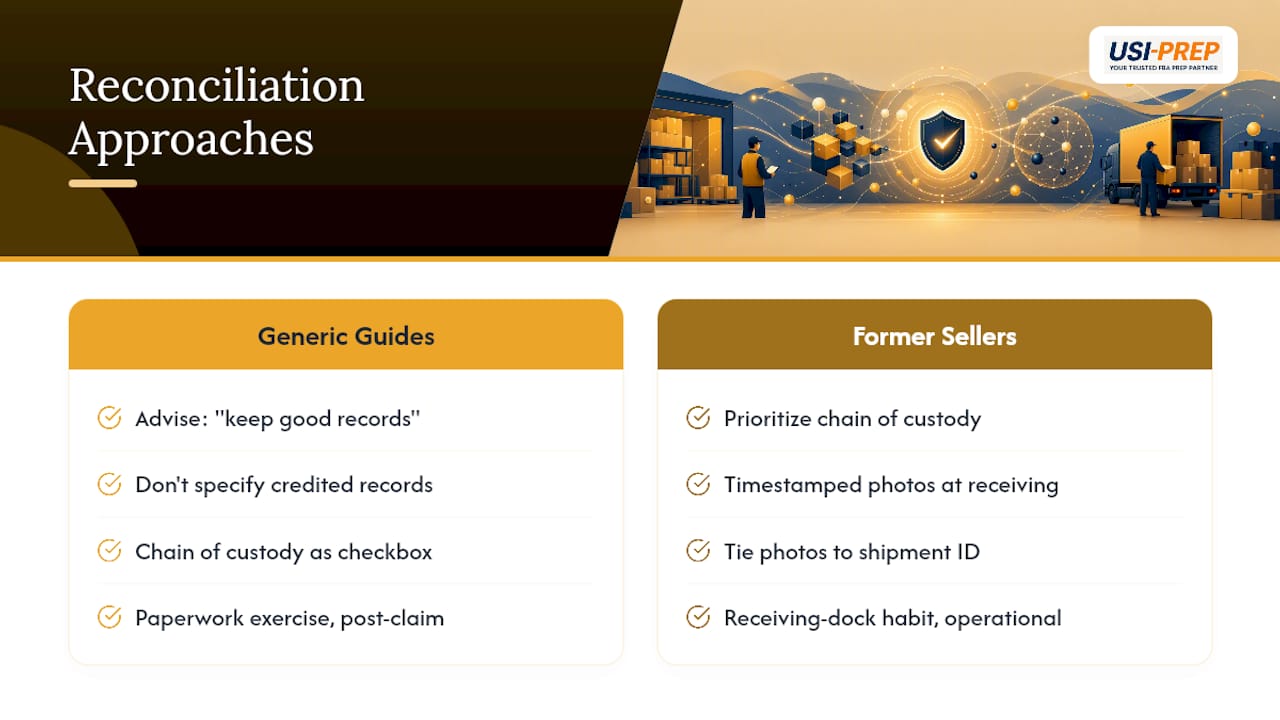
Having run FBA operations before building fulfillment processes for other brands changes what you prioritize. Chain of custody stops being a compliance checkbox and becomes the thing that determines whether a $2,000 claim gets approved or denied. Photo documentation at receiving, timestamped and tied to a specific shipment ID, does more to protect a seller’s margin than any dispute letter written after the fact.
The sellers who reconcile FBA inventory most cleanly are the ones who treat evidence collection as a receiving-dock habit, not a claims-department scramble. That’s an operational discipline, not a paperwork exercise, and it’s the difference between recovering losses in three weeks versus three months.
— Akbar
How some fulfillment providers reduce reconciliation headaches before they start
The biggest driver of FBA discrepancies isn’t Amazon losing units randomly. It’s inconsistent receiving, weak documentation, and prep errors that surface weeks later as a mystery adjustment. Some fulfillment providers have processes where every unit that comes through is photographed and logged at check-in, creating the chain of custody a reconciliation case actually needs.
Faster inventory check-ins mean fewer units sitting in limbo long enough to generate a discrepancy in the first place, and full visibility means you’re not waiting on a support ticket to find out where your stock actually is. If you’re prepping shipments in-house and losing hours every month to reconciliation work, download the FBA Prep Requirements Checklist and see what a documented receiving process should look like before your next inbound shipment.
Where to Verify These Reconciliation Steps Yourself
- Seller Central’s help page on Inventory Adjustments for reason codes and dispositions.
- Amazon’s own FBA Inventory tool overview for IPI and stock health monitoring.
- USIPrep’s guide on FBA check-in workflows for receiving timelines and eligibility.
FAQ
How Do You Reconcile FBA Inventory Step by Step?
Confirm the shipment is Closed, pull the Inventory Ledger and Inventory Adjustments reports, strip out net-zero adjustments, then file a case with both ownership and delivery evidence attached once you’re past the eligibility date.
What Are the Biggest FBA Reconciliation Mistakes to Avoid?
Filing before a shipment reaches Closed status, submitting only one evidence lane instead of both, and skipping the chronology that ties shipment events together are the three most common reasons cases get rejected.
Is Amazon Still Commingling Inventory?
Amazon still offers commingled (stickerless) inventory pooling for eligible ASINs, though many sellers opt for FNSKU labeling instead specifically because it simplifies reconciliation and reduces disputes over which unit actually went missing.
Is FBA Still Profitable in 2026?
FBA remains viable for most sellers, but margins depend heavily on controlling avoidable costs like unresolved discrepancies. Diligent reconciliation alone can recover roughly 1 to 3 percent of annual revenue that would otherwise go unclaimed.
How Long Does an FBA Reconciliation Case Take?
Most investigations resolve in 2 to 30 days, though complex cases involving multiple SKUs or shipments can take up to 60 days.